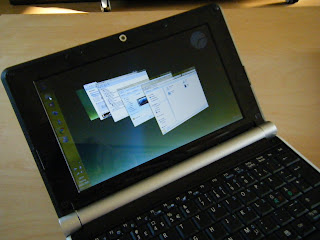
Windows 7 RC on a Packard Bell Dot mini notebook

Updated October 30, 2011: Use this guide to install a regular Windows 7 from a USB stick also! Just use your Windows DVD/ISO instead of downloading the release candidate. Follow the steps using the normal Win 7 DVD or ISO and just skip the downloading part, the image does not exist anymore.
I just got my Packard Bell Dot with XP Home on it, and decided to try the official Windows 7 version. Why not?
And as you see, it is running quite well.
The look and feel is very good, just as fast as XP. Full aero is enabled - it runs smooth and fluid and I really have not had any problems the first week. Will keep Windows 7 on it for sure!
Only problem with installing was to get the 8 GB memory stick bootable, the utilities mentioned around the net was for 4 GB sticks and crashed when I tried to format a 8 GB USB stick.
And also I had to get new drivers for the wireless network card, else the wireless just worked on about every other reboot.
Install Windows 7 Release Candidate on the extra partition on the PC (called Data), then you can format the original XP partition when you are comfortable that everything works to regain the space. But in the beginning it is a good idea to keep XP, if you need drivers like the wireless for Windows 7 then you can boot in XP, find the drivers and save them on the disk. Boot Windows 7 and install the drivers from the same location.
Installing Windows 7 on the Packard Bell Dot:
First you must make a bootable USB memory stick and installing Windows 7 Release Candidate from it. If you have Vista in a computer skip these steps, just download the Windows7 version and extract it to your memory stick. Then make it bootable from the command "diskpart" in Vista. Google it. Or see step 3 in this Norwegian article about installing Windows 7 on an Asus EEE.
But if you only have XP like me:
1. Follow these steps to make a bootable DOS USB Stick.
2. To make it NTFS: do only the second step from this Asus eee guide; that is: download the tools, open a command window and run the command bootsect.exe /nt60 F:
from a command prompt. (Assuming F: is your USB stick)
3. Use your Windows 7 DVD or ISO image and extract all the content to F: (using the program 7zip or equivalent - right click and extract everything to F: using full path names).
4. Start your Packard Bell Dot, when the first screen with the Packard Bell logo shows, press F8 and choose the memory stick as boot device (usually number 2 on the list).
Just let Windows install and have fun.
Yes - I found new drivers version 7.6.1.204 for the wireless Atheros AR5007EG card and installed them, after that the wireless was stable. Everything else seems to be installed by Windows 7. Download these wireless drivers before you start! Or use XP on the other partition to download them afterward, and then just boot into Windows 7 and install them after downloading. (This seems not nessecary in the latest RC. )
And also if you want the scrolling zones on the mousepad/touchpad like it was in XP, you must install the Synaptics driver for Vista - choose the Windows Vista 32-bit edition drivers.
Driver for the JMicron JMB38X memory card reader can be found here - even if it is for HP computers it works on the Dot too. I needed it for xD card support.
To see the XP disk from the Windows 7 installation you have to go into disk management and set a drive letter for the first partition, (D:).
Enjoy and play with your new toy. :)

Remember that this version can be used until March 2010, then you have to uninstall it or buy a version.
The Norwegian paper VG gave the Dot 5 out of 6 points in this article.
And as you see, it is running quite well.
The look and feel is very good, just as fast as XP. Full aero is enabled - it runs smooth and fluid and I really have not had any problems the first week. Will keep Windows 7 on it for sure!
Only problem with installing was to get the 8 GB memory stick bootable, the utilities mentioned around the net was for 4 GB sticks and crashed when I tried to format a 8 GB USB stick.
And also I had to get new drivers for the wireless network card, else the wireless just worked on about every other reboot.
Install Windows 7 Release Candidate on the extra partition on the PC (called Data), then you can format the original XP partition when you are comfortable that everything works to regain the space. But in the beginning it is a good idea to keep XP, if you need drivers like the wireless for Windows 7 then you can boot in XP, find the drivers and save them on the disk. Boot Windows 7 and install the drivers from the same location.
Installing Windows 7 on the Packard Bell Dot:
First you must make a bootable USB memory stick and installing Windows 7 Release Candidate from it. If you have Vista in a computer skip these steps, just download the Windows7 version and extract it to your memory stick. Then make it bootable from the command "diskpart" in Vista. Google it. Or see step 3 in this Norwegian article about installing Windows 7 on an Asus EEE.
But if you only have XP like me:
1. Follow these steps to make a bootable DOS USB Stick.
2. To make it NTFS: do only the second step from this Asus eee guide; that is: download the tools, open a command window and run the command bootsect.exe /nt60 F:
from a command prompt. (Assuming F: is your USB stick)
3. Use your Windows 7 DVD or ISO image and extract all the content to F: (using the program 7zip or equivalent - right click and extract everything to F: using full path names).
4. Start your Packard Bell Dot, when the first screen with the Packard Bell logo shows, press F8 and choose the memory stick as boot device (usually number 2 on the list).
Just let Windows install and have fun.
Yes - I found new drivers version 7.6.1.204 for the wireless Atheros AR5007EG card and installed them, after that the wireless was stable. Everything else seems to be installed by Windows 7. Download these wireless drivers before you start! Or use XP on the other partition to download them afterward, and then just boot into Windows 7 and install them after downloading. (This seems not nessecary in the latest RC. )
And also if you want the scrolling zones on the mousepad/touchpad like it was in XP, you must install the Synaptics driver for Vista - choose the Windows Vista 32-bit edition drivers.
Driver for the JMicron JMB38X memory card reader can be found here - even if it is for HP computers it works on the Dot too. I needed it for xD card support.
To see the XP disk from the Windows 7 installation you have to go into disk management and set a drive letter for the first partition, (D:).
Enjoy and play with your new toy. :)

The Norwegian paper VG gave the Dot 5 out of 6 points in this article.
